Preparing and Drying Herbs for Teas and Oil Infusions
How to Prepare Your Homegrown Herbs for Teas and Oil Infusions
Growing your own herbs is one of the most satisfying ways to connect with your garden and your wellness routine. Whether you're sipping a calming cup of chamomile tea or crafting a soothing rose-infused body oil, the quality and preparation of your herbs make a significant difference in both effectiveness and shelf life.
This article will guide you through the best practices for harvesting, drying, and preparing your homegrown herbs for use in herbal teas and oil infusions. We'll also explore the key differences between using fresh and dried herbs and why it's important to choose the right form for each use.
________________________________________
Why Herb Preparation Matters
The way you prepare your herbs directly affects their:
Flavor and aroma
Therapeutic potency
Shelf life
Safety and stability
Some methods, like drying, help preserve herbs for long-term use, while others, like oil infusions, require attention to moisture content to prevent spoilage. Understanding the role of fresh vs. dried herbs is essential for making the most of your harvest.
Harvesting Homegrown Herbs
The ideal time to harvest herbs depends on the plant part you're using:
Leaves (e.g., mint, lemon balm, sage) – Harvest before the plant flowers, ideally mid-morning after the dew has dried.
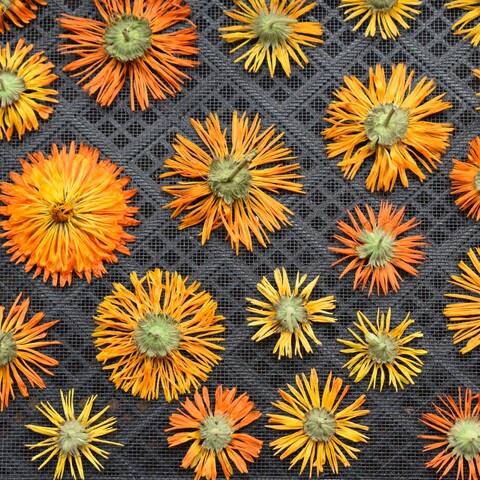
Flowers (e.g., chamomile, lavender, calendula) – Pick just as the blooms open for the highest concentration of essential oils.
Seeds (e.g., fennel, coriander) – Wait until seeds are fully mature and dry on the plant.
Roots (e.g., dandelion, echinacea) – Harvest in early spring or late autumn, when the plant's energy is stored in the root.
Use clean, sharp scissors or snips to avoid damaging the plant. Shake or rinse off any insects and remove dead or damaged material before you begin the drying or infusion process. If rinsing with water (you can do this for leaves and roots) pat down with a towel to remove excess water.
________________________________________
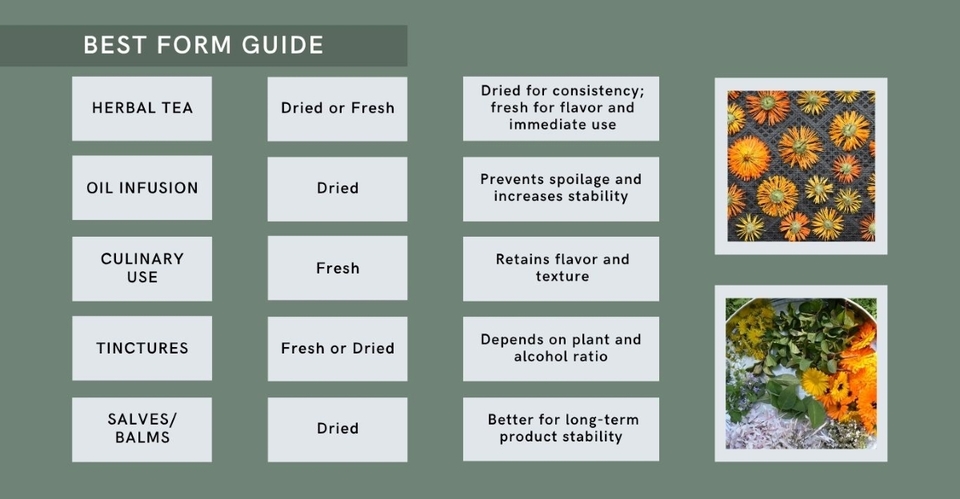
Fresh vs. Dried Herbs: What's the Difference?
Fresh Herbs
Fresh herbs are full of volatile oils and water. They’re ideal for:
- Immediate-use teas (such as fresh mint or lemon balm)
- Culinary use
- Some skincare recipes when you’re using tea or floral water
However, fresh herbs have a high water content, which can lead to:
- Spoilage in long-term oil infusions
- Diluted flavor in teas unless used in higher quantities
Dried Herbs
Drying herbs concentrates their flavor and medicinal compounds. Dried herbs are:
- Essential for shelf-stable oil infusions
- Preferred for most herbal tea blends
- Easier to measure and store
Proper drying preserves the potency of your herbs and eliminates moisture that could cause mold, bacteria growth, or rancidity—especially important in oil infusions.
Drying Your Herbs
There are several ways to dry herbs, depending on space, humidity, and preference:
1. Hanging Air Dry (Best for leafy herbs and flowers)
• Bundle herbs together with twine in small bunches.
• Hang upside down in a warm, dry, well-ventilated, and shaded place.
• Allow 1–2 weeks for drying.
• Herbs are ready when they crumble easily between your fingers or have a crunch sound.
2. Tray Air Drying (Suits all herbs)
• Spread herbs out in a single layer on trays (new/clean seed raising trays work well).
• Place in partial sunny spot (or at least a dry, warm place).
• Turn herbs once a day.
• Allow 5-7 days for drying.
• Herbs are ready when they crumble easily between your fingers.
3. Dehydrator Drying
• Spread herbs in a single layer on dehydrator trays.
• Set the dehydrator to 35–45°C (95–115°F).
• Check regularly—drying takes 1 to 4 hours depending on the herb type and size.
4. Oven Drying (least preferred for delicate herbs)
• Set your oven to the lowest setting.
• Place herbs on a tray in a single layer.
• Prop open the oven door slightly to allow moisture to escape.
• Turn herbs occasionally and remove once fully dry.
________________________________________
Storage of Dried Herbs
Before storing herbs, I will give a 20 second blast in the microwave. This is to kill off any bugs that have survived the drying process.
• Store dried herbs in airtight containers away from sunlight and moisture, this could be glass jars or Tupperware type containers.
• Label with the name and harvest date.
• Use within 6–12 months for best potency.
• If you want to store away long-term, you can use a food vacuum and sealer bags. The herbs must be completely dry as this method gets rid of the air but traps in any moisture.
________________________________________
Making Herbal Teas (Tisanes)
Herbal teas are made using either infusion (for delicate leaves and flowers) or decoction (for tougher roots and seeds).
Using Dried Herbs for Tea
Dried herbs are ideal for consistent flavor and longer shelf life.
Basic infusion method:
• Use 1–2 tsp of dried herb per cup of boiling water.
• Steep for 5–15 minutes covered (to keep volatile oils from escaping).
• Strain and enjoy.
Decoction method (for roots or bark):
• Simmer 1–2 tsp per cup of water for 15–30 minutes.
• Strain and serve.
Using Fresh Herbs for Tea
Fresh herbs can make vibrant teas with a gentle aroma.
Use 2–4 times more fresh herbs than dried, as the flavor is milder due to water content.
Example:
• 2 tbsp fresh mint = 1 tsp dried mint
Wash herbs before use and lightly crush them to release aromatic compounds.
________________________________________
Preparing Herbs for Oil Infusions
Herbal oil infusions are the base for many DIY skincare products like balms, salves, and massage oils.
Why Use Dried Herbs in Oil Infusions?
Using dried herbs in oil infusions is critical to prevent mold and bacterial growth. Even a small amount of water in fresh herbs can cause bacteria and spoilage in the oil.
There are rare exceptions (like St. John’s Wort that doesn’t infuse well when dried), but most oil infusions should always start with dried herbs.
________________________________________
How to Make an Oil Infusion
Cold Infusion Method (Best for preserving delicate properties)
You’ll need:
• Dried herbs (fully dry—no softness or moisture)
• Carrier oil (olive, sweet almond, jojoba, or sunflower)
• Clean, sterilized jar with a tight lid
Steps:
1. Fill jar halfway with dried herbs.
2. Cover completely with oil, leaving about 1–2cm at the top.
3. Stir gently to remove air bubbles.
4. Cap tightly and label.
5. Place in a cool, dark cupboard for 4–6 weeks.
6. Shake gently every few days.
7. Strain through muslin or cheesecloth into a clean, dry jar.
Warm Infusion Method (Faster, but requires care)
• Use a double boiler or slow cooker on low.
• Gently heat herbs in oil for 2–4 hours, keeping temperature below 60°C (140°F).
• Strain and store as above.
Note: Always ensure your storage jar and all equipment are completely dry before use.
________________________________________
Troubleshooting: Avoiding Common Mistakes
• Infusing with moist herbs: leads to rancid oil or mold.
• Not straining thoroughly: leftover plant material can spoil the infusion.
• Overheating oils: damages herbal compounds.
• Using poor-quality, out of date or oxidized carrier oil: reduces shelf life and quality.
________________________________________
Tips for Success
• Grow a drying-friendly herb garden with classics like calendula, lavender, rosemary, peppermint, and lemon balm.
• Harvest gradually throughout the growing season for a steady supply.
• Label everything with dates and details for quality control.
• Infuse oils in small batches to reduce waste and ensure freshness.
________________________________________
With the right preparation techniques, your homegrown herbs can offer beauty, flavor, and wellness benefits all year round. Whether you’re crafting a botanical tea blend for relaxation or an infused oil for skincare, taking the time to properly dry, store, and handle your herbs ensures safety, effectiveness, and satisfaction in every batch.
Image Suggestions:
1. Herb bundles hanging to dry in a rustic kitchen.
2. A glass jar of calendula oil infusing on a sunny windowsill.
3. Dried herbs stored in labeled mason jars.
4. Side-by-side image comparison of fresh vs dried lavender.
5. A cozy cup of herbal tea with fresh lemon balm leaves.
Posted: Sunday 29 June 2025